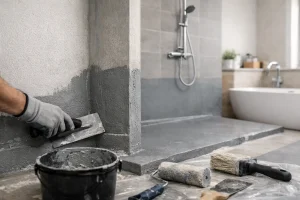

A beautiful new shower can lose its appeal very quickly when a damp patch appears on the ceiling below. Water rarely stays where you can see it. It can work behind tiles, beneath flooring and into wall structures long before there is an obvious leak. This bathroom waterproofing guide explains what protects your home, where it matters most and why it should be planned before the first tile is fitted.
Waterproofing is one of those parts of a bathroom renovation that is largely hidden when the work is complete. That does not make it an optional extra. A properly prepared bathroom helps protect the investment you have made in furniture, tiles, showering and décor, while reducing the risk of disruptive repairs later on.
What bathroom waterproofing actually means
Bathroom waterproofing is the process of creating a continuous barrier that stops water reaching vulnerable parts of the building. This is often called tanking. It sits behind the visible finish, such as tiles or wall panels, and is particularly important around showers, baths and wet room floors.
Tiles and grout are water-resistant surfaces, but they are not a complete waterproof system on their own. Grout has fine pores, sealant can eventually deteriorate and small movements in a property can create hairline gaps. If water gets through, a properly installed membrane beneath provides the essential second line of defence.
The exact approach depends on the room. A family bathroom with a bath and a separate shower needs different protection from a fully level-access wet room. The quality of the existing walls and floor also matters. This is why waterproofing should be designed around the room, rather than treated as a one-size-fits-all product.
Which areas need waterproofing?
The shower enclosure is the highest-priority area. Walls around the shower should be protected up to and beyond the height of the shower head, including corners, joints and the area around pipe penetrations. The shower floor or tray junction needs particular care, as this is where regular water flow meets several different materials.
Baths with shower screens deserve the same attention. The wall above and beside the bath is exposed to daily splashing, especially in homes with children. It is easy to underestimate how much water reaches the wall when the shower is in use.
In a wet room, the waterproofed area normally extends across the entire floor and up the walls to a suitable height. The floor must also be formed with the correct fall towards the drain, so water runs away efficiently rather than collecting in low points. For mobility bathrooms, a carefully planned level-access shower can be both safer and easier to use, but it relies on precise waterproofing and drainage details.
Areas around basins and toilets may not always require full tanking, yet they should still be finished carefully. Pipe openings, floor edges and wall junctions all need appropriate sealing. A small, recurring leak from a waste pipe can do considerable damage when it is hidden inside a vanity unit or behind a boxed-in toilet frame.
The bathroom waterproofing guide to the right materials
A reliable system is made up of compatible parts, not simply a waterproof coating applied at random. Your installer will normally assess the substrate first. Sound, stable surfaces are essential because movement or poor preparation can compromise everything applied above them.
Cement-based tile backer boards are often a sensible choice in shower areas because they are stable and designed for damp conditions. Standard plasterboard is generally unsuitable where it will receive regular direct water exposure. Depending on the setting and finish, a waterproof board, liquid membrane or sheet membrane may be used to create the tanked layer.
The weak points of any system are usually the joins. Waterproof tape is used at wall-to-wall and wall-to-floor junctions, while pre-formed internal and external corners help keep the barrier continuous. Special collars seal around pipes and valves. These details may seem modest, but they are what turn individual materials into a complete protective system.
Wall panels can be an excellent alternative to tiles, particularly for homeowners who want fewer grout lines and easier cleaning. High-quality, professionally fitted panels create a smart, practical surface, but their edges, trims and joints still need meticulous installation. They should not be viewed as a substitute for dealing with an unsuitable or damaged wall behind them.
Preparation comes before the finish
A lasting bathroom starts with a dry, stable base. Old tiles, failing adhesive, damaged boards and signs of historic leaks should be dealt with before the new bathroom takes shape. Covering a problem can make the room look better for a while, but it does not make the moisture issue disappear.
The floor needs equal attention. In older properties, floorboards may require strengthening or levelling before tiling. In a wet room, the subfloor and drainage layout need to be considered together, as the slope to the drain must be accurate without creating an uneven or uncomfortable surface underfoot.
This is also the right stage to plan pipework, shower controls, niches and fitted furniture. Every pipe or fixing that passes through a waterproofed surface needs the correct treatment. Planning these features early prevents unnecessary holes being made after the tanking has been completed.
Why sealant is important, but not enough
Sanitary silicone sealant is the visible flexible joint between a bath, shower tray, basin or panel and the surrounding wall. It accommodates slight movement and helps prevent surface water getting behind the fitting. It should be neat, continuous and applied to clean, dry surfaces.
However, sealant is a maintenance item, not the entire waterproofing strategy. Over time, it can become discoloured, split or lift away at the edges. Regularly checking it and replacing it when needed is a straightforward way to protect your bathroom. If failed sealant is the only thing standing between shower water and an unprotected wall, the risk is much greater.
Good ventilation plays a supporting role too. An effective extractor fan reduces condensation, helping walls, towels and finishes dry more quickly. It will not stop a plumbing leak or replace tanking, but it can help prevent the lingering damp conditions that encourage mould growth.
Common shortcuts that cause expensive problems
The most frequent mistake is assuming tiles are waterproof. Even expertly laid tiles need a suitable substrate and waterproofing in high-splash areas. Another common issue is applying new finishes over damp, unstable or poorly prepared surfaces.
Rushing the process can be just as costly. Waterproof membranes, adhesives and sealants need the correct drying times. Fitting tiles or panels too soon can affect adhesion and compromise the system. The room should also be checked as work progresses, especially around shower trays, drains and concealed pipework, where correcting a detail before the finish is fitted is far simpler.
Choosing the cheapest materials without considering the full system is another false economy. Premium tiles cannot compensate for poor groundwork. Equally, an expensive membrane will not perform as intended if corners, penetrations and floor junctions are left untreated.
A managed installation makes the details easier
Waterproofing involves several connected decisions: the condition of the room, the shower type, the wall finish, drainage, pipework and the needs of the people using the bathroom. Coordinating those decisions across separate trades can be stressful, particularly when the room is out of action.
A fully managed renovation keeps the design and installation working together. At The Bathroom Magician, this means considering practical waterproofing requirements alongside the features you see every day, from a walk-in shower and fitted storage to easy-clean wall panelling and accessible layouts. No jargon. No stress. Just a bathroom designed to look good and work properly for the long term.
Looking after a waterproofed bathroom
Once the bathroom is finished, simple habits help preserve it. Wipe excess water from shower screens and trays, use the extractor fan during and after bathing, and deal with drips promptly. Check silicone joints periodically, particularly around baths and shower trays, and avoid drilling into tiled shower walls unless you know exactly where pipework and waterproofing layers sit.
If you notice loose tiles, persistent mould, a musty smell, staining on an adjoining wall or a ceiling mark below the bathroom, do not wait for it to worsen. Early investigation is usually less disruptive than repairing water damage after it has spread.
The best time to get waterproofing right is before your chosen tiles, brassware and furniture are in place. Give this hidden stage the same care as the visible design, and your new bathroom will have the sound foundation it deserves.