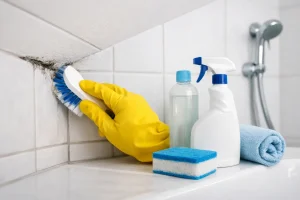

A few black specks around silicone can quickly turn into a stubborn patch on grout, ceilings or the wall behind the toilet. Knowing how to remove bathroom mould is useful, but lasting results depend just as much on tackling the damp conditions that allowed it to grow in the first place.
Bathrooms naturally create moisture. Hot showers, baths, wet towels and limited airflow can leave condensation on cold surfaces long after the room is used. Mould thrives in that lingering dampness. The good news is that most small areas can be dealt with safely at home, while persistent mould is often a clear sign that the bathroom needs better ventilation, more suitable surfaces or a closer look at leaks.
How to Remove Bathroom Mould Safely
Before cleaning, open a window if you have one and run the extractor fan. Wear rubber gloves and avoid brushing dry mould, as this can send spores into the air. If the affected area is extensive, keeps returning quickly, or follows a leak, it is sensible to seek professional advice rather than repeatedly treating the surface alone.
For small patches on tiles, sealed wall panels or glass, use a bathroom mould remover as directed on the label. Many homeowners use a diluted bleach solution, but it is not right for every material and should never be mixed with any other cleaner. Bleach can discolour fabrics, damage some finishes and irritate skin and lungs. Never combine it with vinegar, ammonia or limescale products.
Apply the chosen cleaner carefully, leave it for the recommended time, then wipe with a clean cloth or soft sponge. Rinse where the product instructions require it and dry the surface fully afterwards. A stiff brush may help on grout, but take care not to wear away the grout or damage sealant.
For painted walls and ceilings, choose a cleaner designed for painted surfaces. Scrubbing too hard can remove paint and leave a rougher surface that holds moisture more easily. If the paint has bubbled, peeled or become stained beneath the mould, cleaning may only be a short-term measure. The area may need to dry properly before it is repaired and repainted with a suitable bathroom paint.
Take Extra Care With Silicone Sealant
Black mould marks on shower silicone are very common, particularly around shower trays, baths and screens. Surface staining may lift with a purpose-made mould remover, but mould that has grown into the sealant itself rarely disappears completely.
Trying to cover it with more sealant usually creates a mess and does not address the problem. Old, split or heavily stained silicone is best removed and replaced properly once the surrounding area is dry. Fresh, neatly applied sanitary silicone gives water fewer places to sit and makes routine cleaning far easier.
Why Bathroom Mould Keeps Coming Back
Mould is not simply a cleaning problem. It needs moisture, a surface to settle on and time to grow. Remove the visible patch without changing those conditions and it will often return.
The usual cause is condensation. Warm, moist air meets a cold mirror, window, external wall or ceiling and turns to water droplets. In a busy family bathroom, that moisture can build up quickly, especially if several people shower one after another.
A weak extractor fan, a fan that is switched off too soon, or no opening window can make the problem worse. Poorly insulated external walls and ceilings may also stay cold, while a minor leak beneath a basin, around a shower valve or from ageing seals can create a persistent localised patch.
Look at where the mould is appearing. Mould around the window, on upper corners or on the ceiling is commonly linked to condensation and ventilation. Mould concentrated around a shower tray, bath edge or one section of wall may point to failed sealant, cracked grout or water getting behind the finish. A musty smell, soft flooring or staining on the ceiling below are reasons to investigate without delay.
Simple Habits That Reduce Moisture
A few practical routines can make a real difference. Switch on the extractor fan before showering and leave it running afterwards. If your fan has a timer or humidity sensor, make sure it is working as intended. Opening a window after bathing also helps, provided it is safe and practical to do so.
Wipe down shower screens, tiles and the bath edge after use, especially in bathrooms with limited ventilation. A quick pass with a shower squeegee removes a surprising amount of water before it evaporates into the room. Hang towels so they can dry fully, rather than leaving them in a heap or draped over a radiator with no air around them.
Keep the bathroom door closed while showering to prevent moist air travelling through the house, then allow air to circulate afterwards. Consistent, gentle heating can also help by keeping surfaces warmer and reducing condensation. The right approach depends on the room, though: an older bathroom with a small window may need a stronger extraction solution than a larger, well-insulated space.
Make Cleaning Part of the Routine
A clean bathroom is easier to keep mould-free because soap residue and body oils give mould a surface to cling to. Weekly cleaning of the shower area, bath, tiles and screen is usually enough to prevent build-up. Pay particular attention to corners, grout lines, the lower edge of shower screens and the join between the basin and wall.
After cleaning, do not leave surfaces soaking wet. Drying is the overlooked step. It is particularly worthwhile around silicone and grout, where water can sit for longer than it appears to.
Avoid relying on heavily fragranced sprays to mask a damp smell. The smell itself is a useful warning that moisture may be trapped somewhere it should not be. Find the cause, dry the area and repair the finish if necessary.
When a Bathroom Upgrade Is the Better Answer
There comes a point when repeated cleaning becomes frustrating and false economy. If grout is crumbling, tiles are loose, sealant is failing in several places or painted walls constantly show mould, the bathroom may no longer be protecting the room from moisture as it should.
A well-planned renovation can remove many of the common trouble spots. Large-format wall panels, for example, have fewer grout lines than traditional tiling and are straightforward to wipe dry. Quality shower screens that fit correctly reduce splashing, while a properly formed shower area directs water where it belongs. In a wet room, correct waterproofing beneath the visible finish is essential, not optional.
Ventilation should be considered as part of the design rather than an afterthought. An effective extractor fan, sensibly positioned lighting, warmer surfaces and materials chosen for everyday use can make the room more comfortable as well as easier to maintain. For mobility bathrooms, a level-access shower and easy-clean finishes can also reduce the effort of keeping the space dry and safe.
At The Bathroom Magician, bathroom design starts with how the room will be used day to day. That means considering practical details such as showering habits, storage, ventilation and easy-clean finishes alongside the overall look. No jargon. No stress.
When to Call in Help
Small surface patches are usually manageable, but widespread mould needs attention. Arrange an inspection if it covers a large area, appears after a known leak, returns within days of cleaning, or is accompanied by damaged plaster, loose tiles or persistent damp odours. These signs can indicate water entering behind the finished surface, where household cleaning cannot reach.
A bathroom should feel fresh after a shower, not like another job waiting to be done. Deal with mould promptly, keep moisture moving out of the room and do not ignore the small failures in grout, sealant or extraction. Those practical details are what keep a bathroom looking good and working well for years.