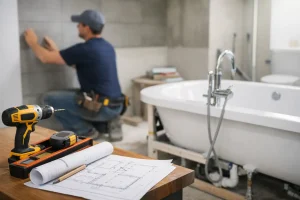

A bathroom renovation can look deceptively simple once it is finished. Behind the calm lines of a new shower screen, neatly aligned tiles and well-chosen lighting sits a carefully managed sequence of work. Understanding bathroom installation step by step helps you plan realistically, ask the right questions and feel confident that your home is in safe hands.
For most homeowners, the priority is not learning to manage every trade themselves. It is knowing what happens when, why each stage matters, and how a professional installation team protects the quality of the final result. No jargon. No stress.
Before bathroom installation begins
The best bathroom projects are decided long before the old suite is removed. An initial survey looks at the room as it really is, rather than as it appears in a brochure. That means measuring carefully, checking the position of windows and doors, considering ceiling height, and assessing existing plumbing, electrics and ventilation.
This is also the time to discuss how the bathroom needs to work for your household. A busy family bathroom may need generous storage, hard-wearing surfaces and a bath that is easy to clean. A smaller en-suite may benefit from a walk-in shower, wall-hung furniture and large-format tiles that make the room feel less busy. For someone planning to stay in their home long term, features such as low-threshold shower access, supportive grab rails and non-slip flooring can make a meaningful difference without compromising on style.
A good design balances the wish list with the practical limits of the room and budget. Moving a toilet or soil pipe, for example, can be possible, but it may add cost and complexity. Keeping key services in a similar position can free up more of the budget for quality fittings, tiling or furniture. The right answer depends on the property and how much the new layout improves everyday life.
Bathroom installation step by step
1. Finalising the design, products and schedule
Once the layout is agreed, every visible and hidden element should be specified. This includes the bath or shower, toilet, basin, taps, shower valve, furniture, tiles, wall panels, flooring, lighting, extractor fan and accessories. Making these choices early avoids the frustrating delay of discovering that a chosen item is unavailable once work has started.
A fully managed service also coordinates the order of work. Bathroom fitting involves several skilled trades, and timing matters. Plumbers, electricians, plasterers, tilers and fitters need to work in the right sequence, with materials ready when they are needed. This is where a single point of contact can remove a great deal of pressure for homeowners.
2. Protecting the home and removing the old bathroom
Installation begins with sensible preparation. Floors on access routes should be protected, and the work area kept as contained as possible. There will inevitably be some noise, dust and disruption during a renovation, particularly at the removal stage, but careful preparation keeps it manageable.
The old sanitaryware, tiles, flooring and any redundant fittings are then removed. This is often when hidden issues come to light. Damaged floorboards, tired pipework, previous leaks or uneven walls are not unusual in older homes. Addressing them properly is preferable to covering them up, because a beautiful new bathroom needs a sound base.
3. First-fix plumbing and electrics
With the room stripped back, the essential services can be adjusted. First-fix plumbing covers the pipework that will sit behind walls, beneath floors or inside furniture. This stage positions hot and cold feeds, wastes, shower valves and toilet connections to suit the new design.
Electrical work is also planned around safe bathroom zones. Lighting, illuminated mirrors, shaver sockets, underfloor heating controls and extractor fans all need appropriate positioning and professional installation. Ventilation deserves particular attention. A powerful, correctly fitted extractor helps control condensation, protects finishes and keeps the room more comfortable over time.
If you are having a wet room or level-access shower, the floor construction and drainage fall are formed at this stage. It is precise work: water must drain efficiently while the surface remains safe and comfortable underfoot.
4. Building, boarding and preparing surfaces
The room now starts to take shape. Stud walls may be built to create niches, conceal pipework or support wall-hung furniture. Suitable boards are fitted in wet areas, and walls and floors are levelled where necessary.
This stage is easy to overlook when choosing a new bathroom, yet it has a direct impact on the finish. Tiles will only look straight if the surface beneath them is straight. Shower panels need secure, even walls. Furniture needs a solid fixing point. Careful preparation is one of the reasons professionally fitted bathrooms feel considered rather than rushed.
5. Waterproofing shower and wet areas
Any area exposed to regular water needs proper waterproofing before tiles or finishes are applied. This is particularly important around showers, baths and in wet rooms. A tanking system forms a protective barrier behind the final surface, reducing the risk of moisture reaching the structure of the home.
Not every bathroom requires the same level of waterproofing in every area. A fully tiled wet room needs a different approach from a bathroom with wall panelling around a bath. What should not vary is the attention given to the places where water is most likely to escape through joints and corners.
6. Tiling, wall panels and flooring
Once the room is prepared and waterproofed, the visual character of the design begins to appear. Tiles may be fitted to selected walls, full-height shower areas or the floor. Wall panels are another practical option, offering a clean appearance with fewer grout lines and easier day-to-day maintenance.
Tile choice affects more than colour. Large tiles can make a compact room feel more spacious, but they need a sufficiently flat surface and thoughtful cuts around fixtures. Smaller tiles can suit curved areas or create a feature, although they bring more grout lines to clean. On floors, slip resistance and warmth underfoot are often more important than simply choosing the most eye-catching finish.
Grout and sealant are finishing materials, but they should never be treated as an afterthought. Their colour, neatness and durability have a significant effect on how the bathroom looks and performs.
7. Second-fix installation and finishing touches
At second fix, the bathroom becomes functional again. The toilet, basin, bath, shower screen, taps, shower head, furniture, mirror and accessories are installed. Plumbers connect and test the fittings, while electricians complete lights, fans and any other approved electrical features.
This is also when the small details earn their place. The height of a mirror, the position of a towel rail, the reach of shower controls and the opening of a vanity unit all affect how easy the room is to use. A well-designed bathroom should not just photograph well. It should feel natural on an ordinary weekday morning.
8. Testing, checking and handing over
Before a project is complete, fittings should be checked for leaks, drainage should be tested, and doors, drawers and shower screens should operate properly. Sealant lines, tile edges and finishes deserve a close inspection too. A professional team will make sure the room is clean, safe and ready to use.
You should also receive clear guidance on caring for your new bathroom. Most surfaces stay looking better for longer with simple, regular cleaning rather than harsh products. Ventilating the room after showers, wiping down glass and checking sealant periodically are small habits that protect your investment.
How long does a bathroom installation take?
There is no single timescale for every project. A straightforward replacement where the layout remains largely unchanged may take around one to two weeks. A full renovation involving new plumbing positions, structural preparation, extensive tiling or a wet room will usually take longer.
The most reliable timetable allows for the condition of the existing room, drying times for materials and the availability of selected products. Trying to compress these stages can create problems later. It is better to have an honest plan and skilled workmanship than a rushed finish.
For homeowners around St Neots and Cambridgeshire, The Bathroom Magician brings design, product selection and installation together under one carefully managed service. That means fewer decisions to chase, fewer trades to coordinate and a clearer route from first ideas to a bathroom built for daily living.
A new bathroom should make your home easier to enjoy, whether that means a more relaxing shower, safer access, better storage or simply a room that feels properly yours. Start with a thoughtful design and a clear installation plan, and the finished space will have the quality to match.